Quilted Sweatshirt Sleeve DIY
This quilted sweatshirt sleeve DIY is a fun upcycling project to honor Earth Day.
In fact, it’s the perfect way to take a sweatshirt that has seen better days or a sweatshirt that was a crafting fail and breathe new life into it.

In my case, it was an embroidery project gone bad.
The sweatshirt was brand new, but the embroidery design on the chest failed miserably.
So I decided to do some reverse applique to remove the failed design and add a quilted sleeve to level it up.
And since the Woodstock on the sleeve came out really well, it had to have a Peanuts theme.
Use Fabric Scraps For A Quilted Sweatshirt Sleeve

This is where fabric scraps always come in handy!
For this quilted sleeve, you can use any kind of cotton fabric you have.
And for me, that meant Peanuts Gang fabric scraps from a quilt top that I was making.
So I grabbed all the scraps I had and started cutting out squares.
Quilted Sweatshirt Sleeve DIY Tutorial
The detailed quilted sweatshirt sleeve tutorial below is how I put it all together.

How To Make A Quilted Sweatshirt Sleeve
Do you have a sweatshirt that needs a refresh?
Using fabric scraps to create a quilted sleeve is a fun and trendy way to add some flair!
Materials
- Sweatshirt
- 100% cotton fabric (large scraps are perfect)
- Basting spray
- Optional: Stick N Stitch (if you want to do a reverse applique)
- Optional: Heat transfer vinyl
- Optional: Embroidery thread
Tools
- Sewing clips
- Seam ripper
- Scissors or rotary cutter and mat
- Pins
Instructions
- Gather your materials.

- Lay out the sweatshirt and cut off your sleeve of choice..

- Cut off the cuff ribbing from that same sleeve.

- Use the seam ripper to open up the sleeve seam.

- Cut the fabric scraps into 4" squares and sew them together in a panel. Add a top and bottom border if your fabric designs needs some extra length to fit the sleeve.

- Baste the fabric panel onto the sleeve to prepare for sewing. Use pins if you please.

- Stitch the ditch for the whole grid to attach the fabric panel to the sleeve.

- Trim the excess fabric around all of the edges of the sleeve.

- Fold the sleeve right sides together and attach sewing clips to prepare for sewing.

- Sew the sleeve back together using the method or your choice. This could either be a zigzag stitch or an overlock stitch depending on what your machine offers.

- Reattach the sleeve and cuff to the sweatshirt body using your stitch of choice.
- Turn the sweatshirt right sides out and you're done!

Notes
- Reverse applique is a great way to creatively replace an old design or a crafting fail.
Recommended Products
As an Amazon Affiliate, I may receive a small commission if you buy a product using one of the links below.

- Best Sewing Clips ! The transparent plastic clips are easy to use, Helps you see exactly what your sewing, don’t need to worry about stab by needles…
- Make it easy to hold multiple layers of fabrics, binding objects like Quilts, and holding together multiple objects. No Pins needed for Sewing
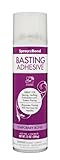
- Temporary Bond: Provides a non-permanent hold, so you can reposition fabric while working.
- Clear & Odorless: Leaves no visible residue and avoids strong fumes.
What Is Reverse Applique?
If you want to make a sweatshirt just like this one, you’ll also want to add a monogram using reverse applique.
If you’re unfamiliar with this technique, here is a quick video that demonstrates the process.
Any Sweatshirt Can Find A New Purpose
Any sweatshirt, old or new, can find a new life with this quilted sweatshirt sleeve DIY.
It may seem daunting at first, but once you make that first cut the fun will take over the fear.
So, what design will you create for your first (because there will be more than one!) quilted sweatshirt sleeve design?
Share your creative ideas in the comments below!